Showing posts with label Sewing. Show all posts

Wednesday, June 23, 2010

Phew! I completed some more projects...

I've had a couple projects on my list of "to-do" for awhile. One of them being a cover for the infant car seat. A lot of people recommend having a light blanket that you throw over the car seat so that you can shade the baby in the sun or put over them when you're in the store to prevent strangers from touching your baby (Really?!?! That happens!?!? Hands off!) I've seen some sold in the store and coughed at the price. Baby items can be so expensive!
So with 1 1/4 yards of fabric (times two for a front and back) and a little bit of sewing time I made a cover for less than $6! I didn't follow a tutorial - the shape is so basic that it's pretty intuitive. I just made sure that I used an extremely lightweight fabric so that it was breathable and cool.

Some other projects that I knocked off my list were some burps clothes using the freebie pattern I have listed here. I used up scraps from other baby items I used by piecing the top and using terry cloth for the underside.

I also made a couple of knit soakers that are newborn sized. Most of my soakers were knit for about a 6-12 month old. So using the pattern from "Vintage Baby Knits" (pattern = Milo Soakers) and a pattern from Just Jussi blog (posted for free) I knit 2 soakers (and I even lanolized them already!!)
"Just Jussi" has the best pattern because it is super thick and absorbent through the crotch and is shaped in the butt. I like to knit the pattern in the round to avoid seaming. When I get to the crotch section I start knitting back and forth and continue knitting until I'm done with the short-row butt shaping. Then I seam them back to the section worked in the round with seamless kitchener stitch. I also cast on the leg ribbing and work on dpns. This way there's no seaming... yay!
The "Milo Soakers" were knit a little different from the pattern as well. I've knitted the Milo Soakers before and was unhappy with how it's written. First off, the pattern makes HUGE soakers with no shape. Talk about a huge booty! So I decided to make these changes:
1. Knit them in the round!!
2. Knit the ribbing in twisted rib on one size smaller needles (I used U.S. 2 needles)
3. Knit the body of the soakers in stockinette stitch NOT garter stitch (I really thought the soakers looked even more bulky in garter stitch and they look smoother and nicer in stockinette. Also by knitting in the round you avoid any purling...)
4. When you get to the crotch section (ribbing) work back and forth on both sides. Instead of knitting a 7" crotch - knit each side back and forth in ribbing for 3.5". Join the crotch at the middle with a 3 needle bind off.
5. Add leg ribbings for an even better fit (knit in the round with dpns)
This way they fit better and are seam free!! Yeah!

These are both knit in Knit Pick's Bare yarn (Just Jussi's are knit with a strand of aqua Shepherd's Wool in the crotch). I knit both pairs using size U.S. 3 needles. So it's a thick knit and smaller. They turned out exactly how I wanted them!!

Wednesday, June 16, 2010

DIY Boppy Cover

I received a "bare naked" Boppy as a shower gift with the intention of making a personalized cover. Every Tuesday my mother and I get together for a weekly lunch and we do something (ranges from a movie, pedicure, or a crafting project). My favorite is when we create something together. This week I had the Boppy Cover in mind. I googled Boppy Cover Tutorial and couldn't really find anything specific. So my mom and I made our own pattern - it took a couple hours (and still needs a little tweeking) but I think it turned out great! The most important part of the cover that is missing in most tutorials is a gusset in the cover. If you strictly trace around the pillow and make it like that it will be too small or really gathered and puckered. We put a gusset in the middle of the "horse shoe" and we put a zipper on the back. After we do a little more tweaking, I believe we'll start making and selling these (sorry, I'm not posting the pattern on here for free...)
Take a look at the basic cover - it's chenille on the back and cotton on the front. Next time I'm adding some piping and perhaps making a pieced front to match his quilt or room...

Saturday, May 29, 2010

Sleep Sack

It's so hard to decide what type/size of baby clothes to buy. You always hear, "babies don't wear newborn sized clothes. They wear 0-3 months for only a couple weeks." So I never know what to buy, especially since I don't know when the little man will arrive. But I decided that you can't really go wrong with sleep sacks. But while looking at sleep sacks I realized that either the quality really lacked or they were crazy expensive. My solution? Make my own!I searched Etsy for a sleep sack pattern and came across one. I won't list the pattern because frankly it was a bear to work with and had a lot of problems - and I don't want to publicly insult the pattern maker. But after receiving the pattern I met with my mom for the afternoon and we worked on the sack. It was the perfect afternoon project. We picked out some polka dot fabric for the outside and blue stripe for the inside. After cutting out the pieces and reading the directions like 32 times (I'm not exaggerating. She read them, I read them, we read them together, we read them aloud, we read them silently, etc.) we just decided to wing it. A sleep sack is a pretty straight forward pattern (even more bewildering how the pattern managed to be so insanely complicated and backwards!!)After a couple hours we ended up with an adorable sleep sack for Little Man. Hopefully he enjoys it!!

Thursday, May 27, 2010

2 months later...

I can't believe how long I've neglected this blog for! I'm so sorry. But I've been busy with a new job, being pregnant, and finding a new home in a new state. So I have a couple excuses... right?
(image via DryIcons.com)

Well, I guess I should publicly announce that we are expecting a little BOY. I know I didn't announce on the blog when we found out because I was waiting to surprise my family. The secret has been out for a while but I haven't been around to declare it publicly yet. We are super excited for his arrival and can't wait!
In the crafting sector - I've been busy at work with all sorts of projects for our son as well as a couple for the house and the dogs. The most important project that I have completed recently was my FIRST QUILT! Yes, you heard right - I finished a quilt. I'm a member of the Bernina Sewing Club at our local quilting store. Once a month they hold a class and teach you a new technique on your Bernina Sewing Machine. It's a nice afternoon that I spend with my mother (who is a great quilter). One of the projects last fall was a quilt that you quilted as you went along. So it was quilted block by block instead of quilted at the end. This was what allowed me to finally make a quilt. With my back injury I can't quilt the top of a large piece of fabric because it just makes my back throb. But since they were 16 inch blocks (I believe) it was much easier and I could do a little at a time. I started the project last November and finally finished the quilt which was laying in the closet last month.
Here it is! The fabric (I can't remember it's name) was purchased in a fat quarter bundle from Fat Quarter Shop online on SUPER SALE. I think it turned out summery and bright (I can't stand baby blue stuff for the baby). What do you think?

Friday, March 26, 2010

Cloth Diapering

I apologize if baby posts take over this blog for a little while. But I'm getting so excited now that I'm almost 6 months pregnant!
My nausea has finally subsided and I'm able to function. Good thing because I started a new job a couple weeks ago! So I'm a busy lady lately. But I had managed to fit in a project or two in my spare time. The biggest project on the horizon is that I need to start sewing up some cloth diapers. We're planning on cloth diapering and I went and registered for them last weekend and was astounded at the price. $16-20 per diaper is so expensive! But I figured that I could try my hand at making some myself. I still plan on buying most of my cloth diapers (they will last longer and will be made of better materials) but I think I could also try to make a few. Here's my attempt this past weekend.
The first diaper is using a left over tank top of mine for the knit fabric outside and it's got a flannel lining. It's a soft pink and really beautiful. The next diaper is a blue knit fabric and lined with diaper cloth for the lining. I actually think the diaper cloth lining works better. Both have soaker pads made out of flannel and diaper cloth. I'll see how they fit once the baby comes. I purposely posted a blue and pink diaper because I didn't want anyone to know if this baby is going to be a boy or girl. I also figured that the color really doesn't matter since they will need a diaper cover anyway -- so truthfully they'll be covered up.
bAnyone out there sew their own cloth diapers? Any patterns you recommend? I used the pattern by Celtic Cloths available free online. I also tried the pattern by Little Comet Tails but I wasn't as successful at that one. I also didn't make the diapers "All in One" with a waterproof P.U.L. outer since P.U.L. is quite expensive and I don't know if these will even fit!

Friday, February 5, 2010

I Could Tease My Mom All Day!

(A random picture I took recently)

Hi Mom (I know you're reading this)! I'm sure you're sitting there now just beet red in the face because I'm being so stubborn. But I promise you, the news will be worth the wait...

To All Readers - I'm sure you're confused what I'm talking about. But yesterday Sam and I went to the OB office for a check-up (I wish I would have been warned about how long you can wait to be seen by the doctor!! It seems like 2 hours is the norm and I think that's just ridiculous!). After talking with the doctor and getting some useful information on my nausea she grabbed the doppler to listen for baby's heartbeat. She couldn't find it after some long searching. So she grabbed an ultrasound machine out of the hallway and placed the probe on my belly. Immediately our little bean starting doing the jig! Little Bean was sucking it's thumb and even waiving at us! Too cute and so exciting to see. I couldn't help myself, I asked the doctor if she could give us a gender determination. You see - we're excited to know what this bean is! I have to know if I should be knitting pink or blue!

After searching the ultrasound for a minute she was able to get the aptly named "toilet shot" for a gender prediction and gave us her *guess*. I say "guess" because she doesn't want to be held responsible for being wrong. But she was pretty sure and said that they can confirm at a high powered ultrasound in 2 1/2 weeks (our ultrasound was an oldie: Sam laughed when it popped up on the screen "Copyright: 1998").

So we celebrated the big news and are so excited to know if we will be having a little daughter or a little son. But I haven't popped the news to my parents yet and my mom is less than happy! But I'm kind of enjoying this little secret that Sam and I have. So you'll have to wait just a little longer mom!!

In craft news, there are a couple items that I have on my list of "To-Do's". Here are links to projects that I will be getting started on ASAP:

1. Sleep Sack Pattern by Twice As Nice Boutique. I just bought this pattern and can't wait to receive it in the mail. It will be a lot of fun to sew!!
2. Berroco Booklet #292 Patterns called "DK Baby". I want to buy this pattern book because there are a lot of cute patterns. Anyone ever made anything from this?
3. The 90 minute shirt by MADE. This is an awesome blog that I read regularly. This method for making a shirt is so cute!
4. Wee Weka Cloth Diapers. I've made tons of cloth diapers for baby gifts and now I'll need to start making some for myself. Let the sewing begin!

Saturday, October 31, 2009

October Crafts & Free Online Pattern

This month I placed an order with the "Fat Quarter Shop" and received some beautiful fat quarter bundles. I ordered the Aspen Wildwood Fat Quarter Bundle (bottom right) and another bundle (top left) that was clearanced and no longer offered. Fat Quarter Shop mailed out my order quickly and it was packaged really professionally. I will surely shop there again! Now I just have to figure out what I'm going to make with my purchases...
I'm also finishing up my sister's wedding gift. Scrapbooking takes so much time! But it's almost finished and should be ready for her wedding this weekend.
The top right is a preview of the stroller blanket I am writing up as a freebie. I still need to finish the seaming and sewing on the fabric backing. With so many other projects as a higher priority, I'm trying my hardest to get it finished. But I realized with this project that I HATE seaming garter stitch. Stockinette seaming is much, much easier and cleaner-looking.
The bottom middle picture is another Bobbled Bloomer by Kat Coyle in "Boho Baby Knits". I'm addicted to the pattern!! This time I made it in a cotton yarn so it's purely decorative and not functional as a diaper cover (how functional can bobbled bottoms be anyway?)
I did, however, make a pair of baby socks to match the bloomers with the leftover yarn. It's a free pattern available online by Valley Cafe called "North Country Cotton Baby Socks".

Saturday, September 26, 2009

Online Patterns: Projects sitting in my Queue


I love my Google Reader! It has to be the handiest way to keep up to date on all the blogs I follow. And following all sorts of blogs is pure inspiration.

Every time I open Google Reader I am confronted with the hard work and creativity of individuals over in blogosphere which just gets my creative juices pumping. But I can't work on every project that I am inspired by. Unfortunately I just don't have time (or the right recipient). So these projects make their way into my "Queue of things to do".

I have quite a long list of "To-Do" projects. They range from knitted dresses to sewn juice pouch purses. And since these bloggers have spent the time and energy to share their creative works for free with the world - I want to give a little "shout out" to some of the ones that I have been itching to make. Hopefully you will find a project that you find as interesting and inspired as I have. And if you feel so inclined to try your hand at making one of them - leave the author a comment. They love to know that someone loves the project as much as they do...

Zipper Pouch Tutorial
from Twelve22
Adult Twirly Skirt Tutorial from House on Hill Road
Kid's Tiered Skirt Tutorial from Kuky Ideas
Kid's Ruffle Sleeve Top Tutorial from Sparkle Power!
Juice Pouch Purses from Crafty Chic
Baby Kimono from Habitual
Poodle Stencil from Real Simple (I want to use the stencil for a wax paper stencil on a bag)
Nine Patch Door Stop by Oh, Fransson!
The Market Skirt by Made
Fabric Blocks by Sew, Mama, Sew
Softie Scottie Dog by Allsorts
Roman Blind Tutorial by Jen Duncan

Thanks, bloggers! And I hope I make it to your project soon...

Thursday, September 24, 2009

Free Online Patterns: 20 from STC Craft

The publishers of STC Craft have put out an online collection of 20 free patterns from a wide selection of their books. Patterns are available for crafting, sewing and knitting and look like a lot of fun. Some of the projects I have made because they are a part of the books I own (apparently I own a lot of STC Craft books!)

The patterns include (these aren't the titles of the project but an explanation of what they are):
So take a look at the website and see if there are any projects that you can start for holiday gifting.

Happy Crafting!!

Saturday, September 5, 2009

"The Big House" and Heating Pad Cover

Aahh... college football season has started! My Alma mater, the University of Michigan, has their first game of the year vs. Western Michigan University. We should win... but I'll bite my tongue until we have it in the bag.

On a crafting note, I finished a quilted cover for a heating pad. I was tired of the ugly cover that came with the pad (and it wasn't padded enough so even on the lowest setting the pad burned my skin). So using scraps that I had around from a couple projects I whipped up an impromptu cover. I didn't follow any pattern hence it's about 1/2" too short in length (darn it!) but it turned out cute for costing zero dollars!
I used batting between the layers so I could quilt it which also gives a little buffer between your skin and the hot pad. The back side of the cover is just a double layer of off-white quilter's flannel. I made little ties with scraps so the pad couldn't fall out of the cover.All in all, I'm pleased. Next time I'll measure twice and cut once to avoid the size problem!

Tuesday, August 11, 2009

Free Online Pattern: Sundress

The blog Habitual has a free pattern available online for a child's sundress that is quite adorable. Using french seams and a large ribbon for the neck, it has simple shaping that will allow a dress to become a top once your child grows out of it.
I gave a gift last month of a dress made from this pattern. I didn't get a picture of the dress I gifted since it was last minute, but I did take some pictures of the first dress I made. I can't say I'm proud of my sewing skills or the choice of fabric on the first try but it gets the point across. I think this dress would be pretty is a fabric that has some flow. Give it a go...

Thursday, July 2, 2009

My First Quilt

I've been taking a monthly sewing class at a local quilt shop for the past several months. It's been enjoyable to see all the other ladies handiwork and think about how wonderful it would be if I could be as talented in the sewing department as they are. This last month I set my reservations aside and decided to jump feet first in quilting and bought fabric for my very first attempt at a quilt. It calls for 20 fat quarters! And man was it hard to find 20 fabrics that I liked that all went together. I felt like I was buying out the whole quilt shop!
But here is my stack of fabrics...
I'm really excited about this project. With the expert guidance of my mother (an extremely talented quilter) I'm sure this will turn out beautiful. Cross your fingers (and toes) for me!!

Tuesday, June 16, 2009

Embroidery Experiment

I'm trying my hand at embroidery for the first time. I thought I would start out extremely small scale and hand embroider a couple of burp cloths. I bought pre-packaged Gerber Birdseye Cloth Diapers and sewed a rectangle of quilters flannel down the center (I embroidered them first). This is how my little experiment turned out...

Apples & Pears Tote

After making my cousin a Reversible Shoulder Bag by Lula Louise I wanted to make one of my own. I have to say that it was MUCH easier the second time around (and not using denim which gave my machine a work out). I used a pear and apple fabric in bright colors that seemed perfect for the market or grocery shopping. On the reverse side (the bag is reversible, hence the name) is just white twill fabric. I did the top stitching in bright red that matched the fabric and it really pops off the white twill. Total time to make the tote was about 2.5 hrs. It calls for 1 yard of two coordinating fabrics. There's a lot of leftover fabric, but if you aren't using home decor fabric that is long (then you can get away with 1/2 yard), you can't fit the whole pattern down lengthwise and you need the full yard.
So here it is:

Saturday, June 13, 2009

Free Online Pattern: "Pleated Purse"

The blog, My Spare Time, has a free pattern available online called "Pleated Purse". I needed a roomy small bag to take with me to appointments and decided to give it a whirl. It's a straightforward design and is quite cute. However, there must be a mistake with her measurements (or I just can't read her Ikea-like picture directions) because the pleat dimensions just didn't work. So I came up with my own pleat dimensions after a bunch of fussing with it. The basic shape of the bag is cute with a center pleat and side pleats. If you are a seasoned sewer (or better at reading diagrams) - try this pattern out. I made the bag in some cheapo cotton fabric from JoAnn's that I had laying around. I never do a good job at a project the first time around, so I'll make this pattern again with the revised dimensions in a nicer fabric when the bag gets worn out.Total bag cost - $6. Total time - With lots of fussing = 6 hrs. Next time? Probably 4 hrs.

Sunday, June 7, 2009

Free Online Pattern: "Reversible Shoulder Bag"

A project I just recently finished was the "Reversible Shoulder Bag" by Lula Louise. The pattern for the bag is available online from their website for free. It even has a step-by-step tutorial to guide you through making the bag.
I made this bag with the idea in mind that it would be a great market tote. My cousin is getting married this next week and I wanted to make a handmade gift for them. She and her soon-to-be husband are pretty "green" so I thought it would be nice to make them a package for the market (the tag in the picture with the flower is just a removable tag I made describing the bag for my cousin). I included in their gift the Reversible Shoulder Bag made of denim and a blue checkered shirt fabric and a set of four produce bags. The produce bags are a brain child of mine. If anyone is interested leave me a comment and I'll post the directions. I wanted to spiffy up the produce bags so I adorned them with labels from vintage fruit crates and added grommets to put the string through the bag. They turned out nicely and I think will make a nice gift.
The shoulder bag took a good 8 hours to make. But the produce bags can be pumped out once you get the hang of how to "conveyor belt sew them".
Now I need to make myself a bag...

Friday, April 17, 2009

Online Pattern: Buttercup Purse Finished

Good Evening Crafters! Long time, no see! But I've been a busy little bee... Crafting up a storm and now I need to blog up a storm to get all my finished projects listed here and on Ravelry...
I made the Buttercup Bag from the blog Made by Rae today. It was a quick and fun project using only a fat quarter of fabric for the outer and a fat quarter for the lining. I used some extra fabric that I had from the Birdie Sling by Amy Butler that I made.
This is a great small purse pattern. I was impressed with the ease of the directions and the professional nature of the design. It reminded me of an Amy Butler pattern (maybe that's why I liked it!) I've never used a magnetic closure before and it was a fun thing to do and really made the bag useful.
I didn't make many changes to the pattern. As you can see, I used a contrasting fabric for the handle and the top of the bag. I also chose to omit the optional button tab since I used two different fabrics. I also chose to use fusible interfacing on the handle and the top of the bag to give it a little more "oomph." I also did not follow the directions for the handle and instead made the handle 2 inches longer than called for and just cut out one piece (instead of 2) and sewed it like a tube, turned it right side out and top stitched down both side. I then attached the handle like a normal bag, sewing it in when I sewed the lining and outer together instead of attaching on top of the bag.
It turned out great and was about a 2.5 hour project. I think I may make another one to use up some of the scraps I have around. This is the perfect gift for people since it uses less fabric and is on the quicker side to make.
Thanks "Made by Rae" for sharing such a cute pattern to the online community!

Wednesday, March 25, 2009

Easter Craft I Want to Make...


Betz White's Cashmere Bunny Tutorial is too cute! I don't know what I would do with the finished product but that doesn't make it any less tempting. I have some scrap felting wool lay around that could possibly work really well for this project. These are adorable!
I've also been wanting to make the dogs more toys and this shape is great for them. Obviously I would omit the button eyes (I might embroider the eyes) but this would be a fun gift to give my grandparents who are hosting Easter this year and have a dog themselves. Their dog doesn't rip up toys like Maddie does so it would last a lot longer. Hmmm... all the possibilities!

Tuesday, March 24, 2009

Finished Hat and Beginnings of a Quilt

I just finished up knitting a hat with the leftover scraps of Ella Rae Baby Cotton that I had. I needed to use them up to get them out of the way! I can't remember the name of this pattern but it's free online. I'll search around for the pattern and post it later this week when I find it! The leaves were a pleasure to knit and I'm really happy with the turnout. That makes almost 30 hats I've knitted for charity in the past 6 weeks or so!! I'm finally done with all my scrap yarn so now I'm on to finish the playmat blanket that I started. I hope to have the blanket finished by this summer... We'll see how that turns out!
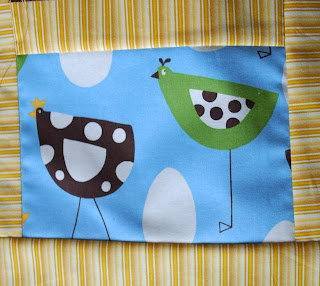
Today I met up with my mom and went to lunch and a quilting store. When we were taking a sewing class she fell in love with a funky bird/chicken fabric and thought it would make a good quilt. Here's the first few test blocks that she has pieced.

Monday, March 23, 2009

Baby Bib Tutorial

As I mentioned in my earlier post, I made a baby shower gift for some family friends and part of the gift was a baby bib that I made using Martha Stewart's Bib shape available here. I looked for many bib outlines since I didn't want to design my own. The only problem with Martha's is that you have to print it out and enlarge it 150% (which I can't figure out how to do straight from my printer so I had to print and scan while enlarging it). But when it was all printed (and taped together since it's bigger than a piece of normal paper) I finally had my template.

Materials:
- Bib template
- Flannel fabric for front
- Flannel fabric that matches for back
- Thread
- Scissors
- Sewing Machine
- Pins
- One snap (or velcro if you choose)
- Scrap of fusible interfacing (if you're using a snap)

Tutorial:


Using the bib pattern, cut one piece from the main flannel and the flannel for the back.


This is what my back piece looked like all cut out.


I'm going to add a snap closure to the bib so I needed to reinforce where the snap will go. Cut a small piece of fusible interfacing (or you could use scrap cotton fabric - you just want to give the area a little more substance) and fuse/sew to the area the snap will go. Make sure you attach it to the wrong side of the fabric!
Now it's time to make the "cloth sandwich" and sew it up - place your fabrics right side together and pin it together. Take it to the sewing machine and stitch 1/4" around the bib leaving an opening at the bottom to turn the bib right side out.


This is the bib that has been sewed and turned right side out. I ironed the piece flat and pinned the opening closed. Take it to the sewing machine and top stitch around the bib. I used a decorative stitch and stitched as close to the edge as I could. This closed the opening on the bottom and cleaned up the look a little bit.


Using a snap kit to attach the snap or however you would like to attach snaps (I use snap pliers since I don't like to hammer).


You're now finished! Now place on baby or wrap up and give it as a gift!